It is common to have multiple products/projects/services in one organization.
- Software vendors would have multiple client projects and would want to separate the cost so that it can be charged back to the client accordingly.
- Product-based company might also have multiple services going on and identifying the cost for each service would be crucial to drill down the company expenses for optimisation purposes.
Hence, in this blog, we will discuss on how to implement cost allocation tags and utilize AWS Cost Explorer to separate and identify AWS cost of the used resources.
Applying Tags to Resources
Using AWS Console
If you notice, during the creation of a resource let say an S3 bucket, you have a Tags field which is an optional field.
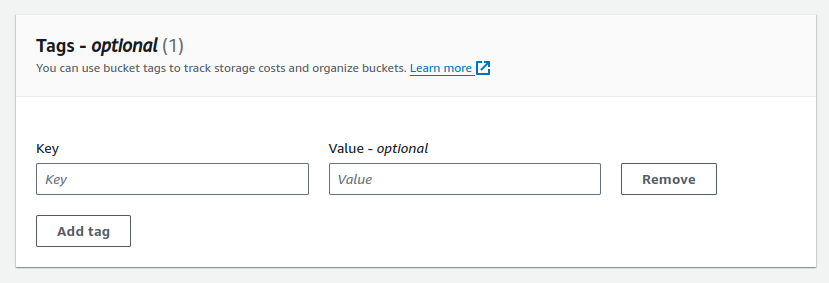
You can add multiple relevant tags that is relevant to your scenario. Me personally would want to just separate it based on projects. So, I have a standardised key of project and the name of the project as the value
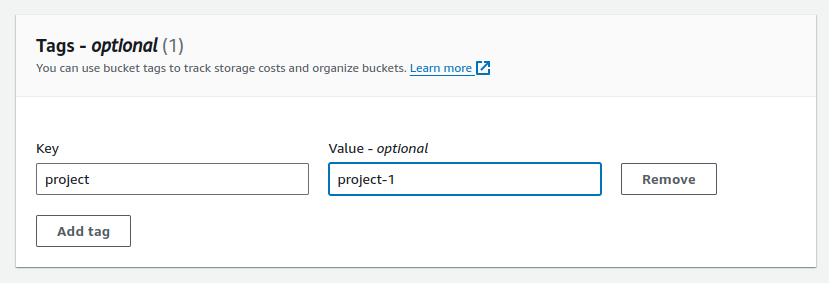
It is advisable to consistently use the key name (in this case project) throughout the whole organisation so during the cost exploration, you can simply group by the tags and get the aggregated result respectively.
Using AWS CLI
Applying the tags when using AWS CLI
# Set your desired bucket name and tags
bucket_name="project-1-bucket"
tags="Key=project,Value=project-1"

# Create the S3 bucket
aws s3api create-bucket \
    --bucket $bucket_name \
    --region ap-southeast-1 \
    --tags $tags #<-- specify the tag here
Using Infrastructure-as-a-Code
If you are using Infrastructure-as-a-Code tool such as Terraform, you can do the same thing by simply specifying the Tags key-value. Refer their documentations for more.
provider "aws" {
  region = "ap-southeast-1"
}

resource "aws_s3_bucket" "example_bucket" {
  bucket = "project-1-bucket"

  tags = {
    project = "project-1" //<---- specify the tag here
  }
}
Explore the Cost
- Enable cost allocation tags. Navigate to https://us-east-1.console.aws.amazon.com/billing/home#/tags
Activatethe interested tags. In my case is theprojecttag.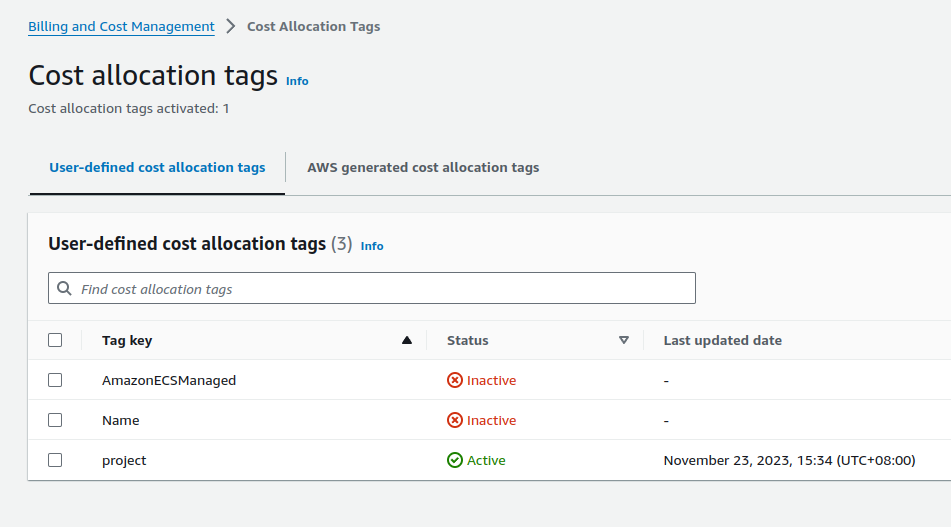
This will enable the activated tags to be filtered in theCost Explorerpage.- Navigate to https://us-east-1.console.aws.amazon.com/cost-management/home#/cost-explorer.
You might need to enableCost Explorerif you open it for the first time. - On the right side of the page, you will notice a filter sidebar that should allow you to filter and categorise the cost by multiple parameters.
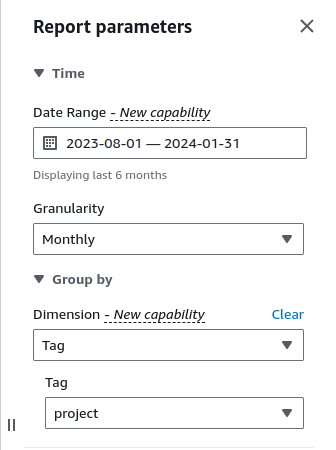
In theDimensiondropdown, selectTag. and after that, you can select the interested tag that you want to group-by to. In my case isprojecttag - You can see the cost represented in graph and table (our end goal)
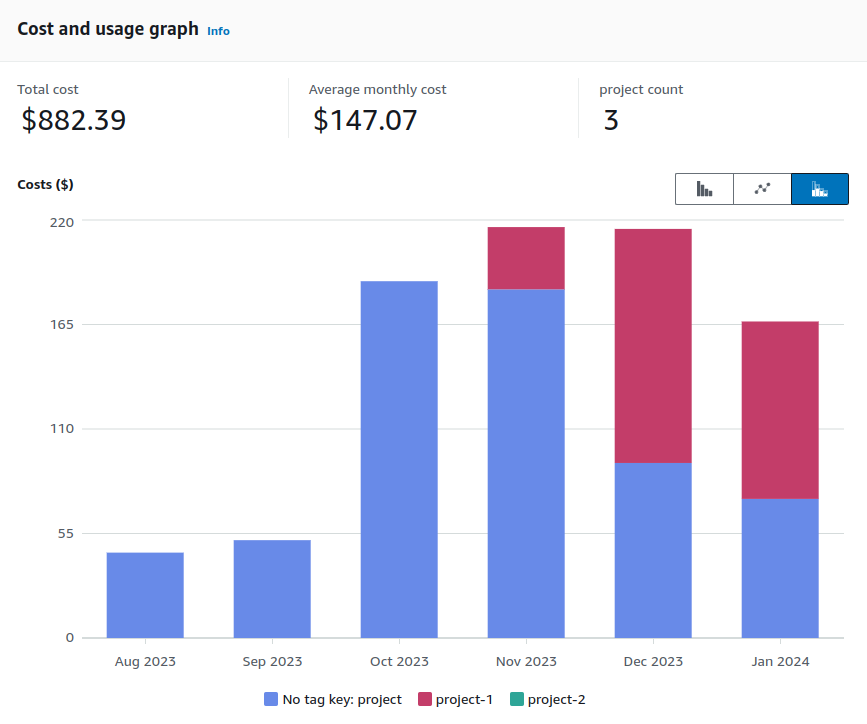
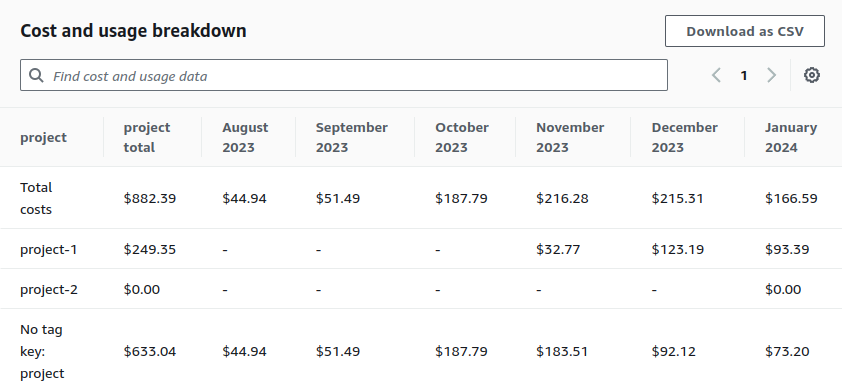
You can also export it as CSV.
Conclusion
In conclusion, implementing cost allocation tags and leveraging AWS Cost Explorer can greatly enhance an organization's ability to accurately allocate costs and track expenses across multiple projects or services. You can also implement multiple tags to drill down further the cost allocation.
Most importantly, just don't forget to attach the tag during the creation of each resources!